Black and White Woman Oil Painting
A guide to painting still life in oil
Welcome to our guide to painting still life in oil. Still-life painting hasn't always enjoyed its current position in the art world. The genre used to be referred to as rhyparography, defined as the painting of 'mean, unworthy or sordid subjects'. It was seen as a lesser art form next to the loftier genres of portraiture or landscape. Fortunately, tastes changed and still-life painting now enjoys a much more rich and diverse history.
In this painting still life in oil tutorial you'll learn how to build a still-life oil painting using this exciting medium. Step-by-step we'll guide you though the process, highlighting what to look out for, including what pitfalls you might encounter. We'll look at setting up your composition and controlling it like a miniature theatre. Then we'll go through each stage of the process, building the painting up in manageable steps. If you're new to oil paints and you don't know where to start, this tutorial will set you off on the right foot, and you can also check out our oil painting techniques guide. Want to practise your drawing? Our how to draw guide has all the tutorials you need.
01. Prep, prep, prep
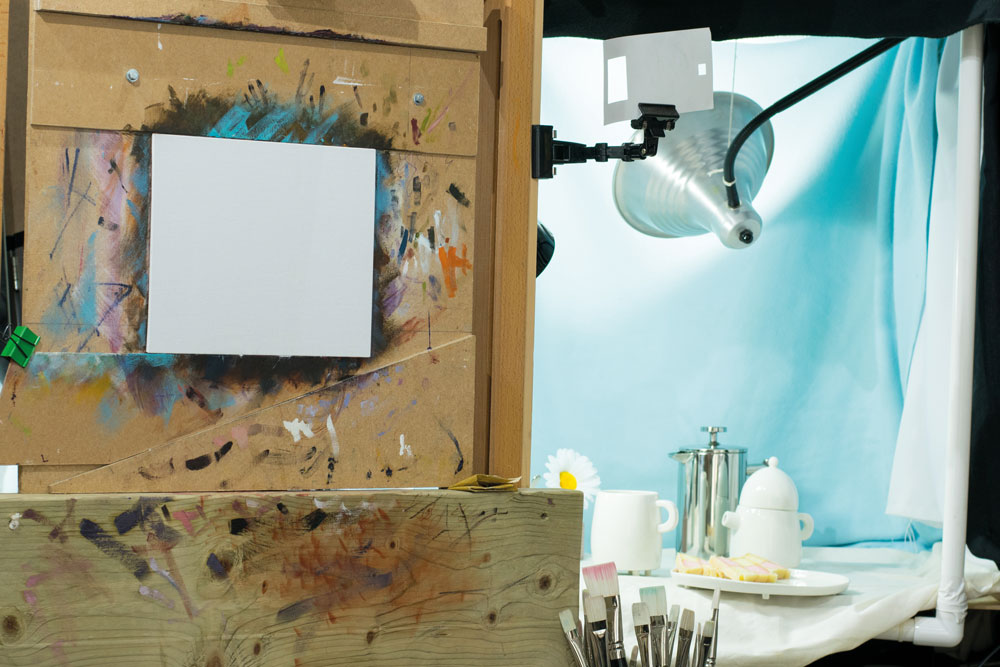
(Image: © Rob Lunn)
First off, spend some time making sure you have everything you need close to hand. Don't suffer for your art – make sure you're comfy. At this stage of composition you're essentially playing. Experiment with different subjects and configurations until you find something that excites you. Don't forget to play with your lighting too – remember that you can use form shadows to help describe the elements of your composition to the viewer. This set-up has two lamps: one directional light coming in from the left and one facing up into the shadow box so it bounces off the interior cloths, both fitted with daylight bulbs.
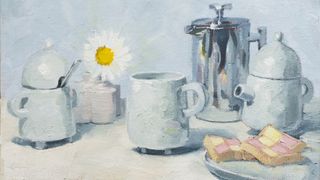
02. Put the life in still life

(Image: © Rob Lunn)
Someone once said that every painting is in fact a portrait. With that in mind, adding a sense of narrative is important, even in a still-life painting. With this composition we're using lovely Haphazard Harmony ceramics by Dutch designer Maarten Baas. These little fellas have great character and instantly add an element of fun and personality to a still-life set- up. In this arrangement we're imagining the coffee cup being the star of the piece, surrounded by the supporting cream jug, sugar pot, coffee pot and cake. The silver coffee pot has been placed so the viewer can see all the elements of the composition reflecting back at them.
03. Perform a dress rehearsal
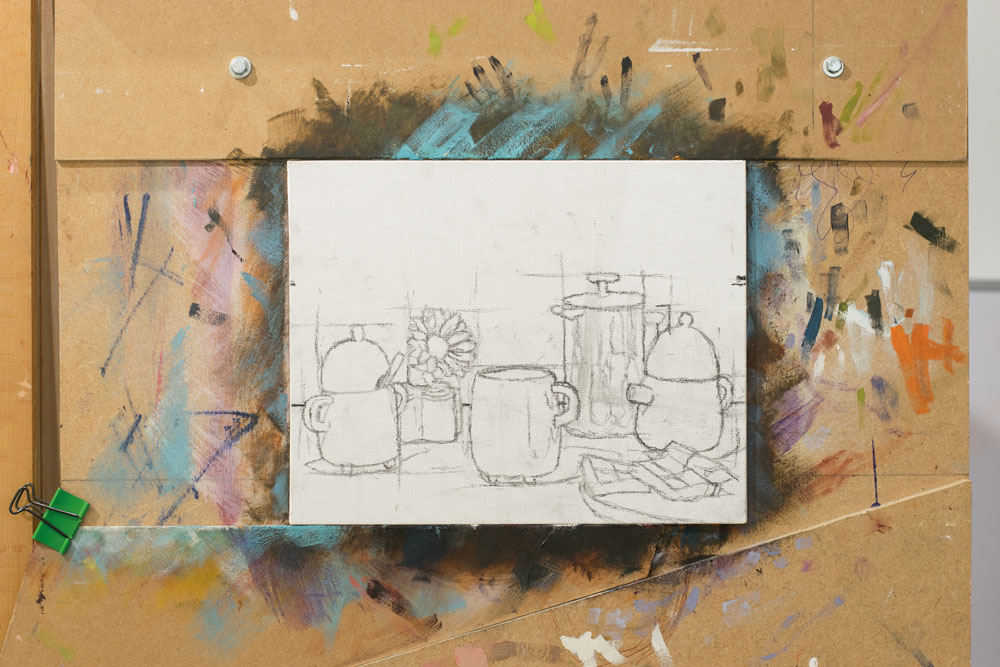
(Image: © Rob Lunn)
Before you open a paint tube, you can get the charcoal out for a dress rehearsal (sometimes called a gesture drawing). The shadow-box acts like a theatre and allows you to control all the elements of your still life. You can create a simple shadow box using a large cardboard box.
This stage is all about testing your composition. If there's something you're not liking, now is the time to change it. Try moving the lighting and repositioning the elements of your still life if need be. Remember that placing objects in front of each other within your composition will enhance the feeling of depth in your painting.
04. Stage a lock-in
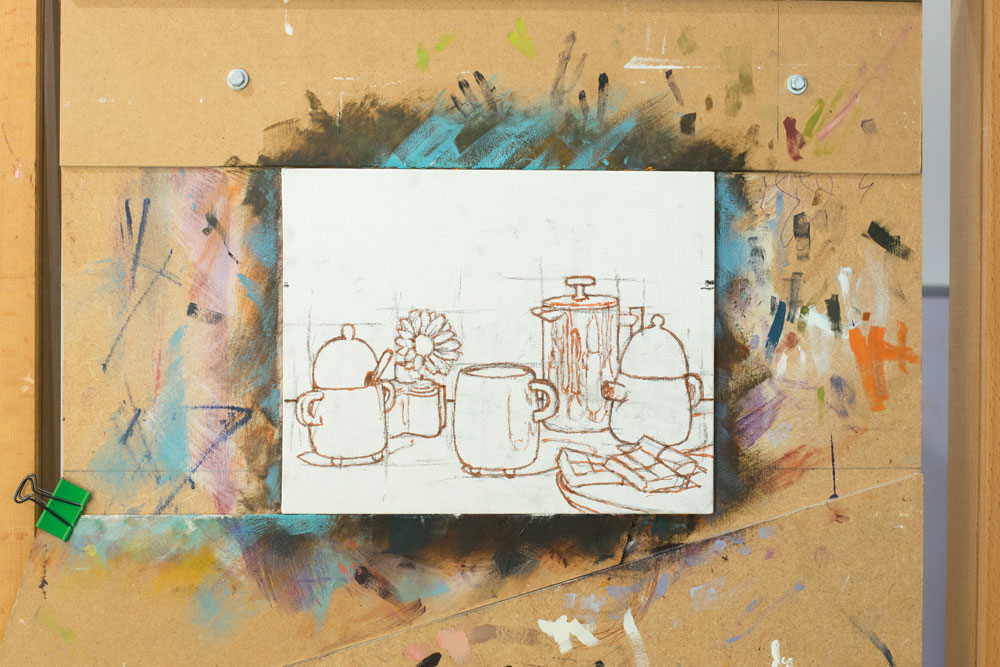
(Image: © Rob Lunn)
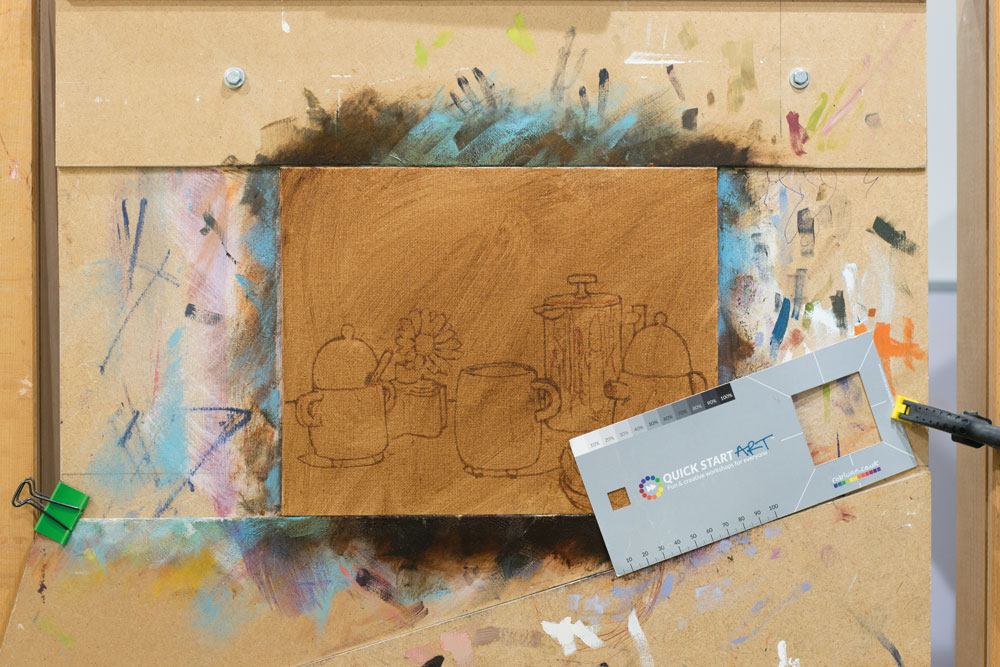
This stage is about saving all the hard work and preparation you've put into your painting so far.
To save time we're using acrylic ink in an Aero Colour Liner pen, but a fine brush will work just as well. You don't want to go to town on detail in this step – just try and retain enough information to inform the painting after the next stage. Applying the ground will obliterate your charcoal gesture drawing so there'll be no going back, but don't forget that each stage is an opportunity to re-evaluate and correct.
05. Get a solid grounding
(Image: © Rob Lunn)
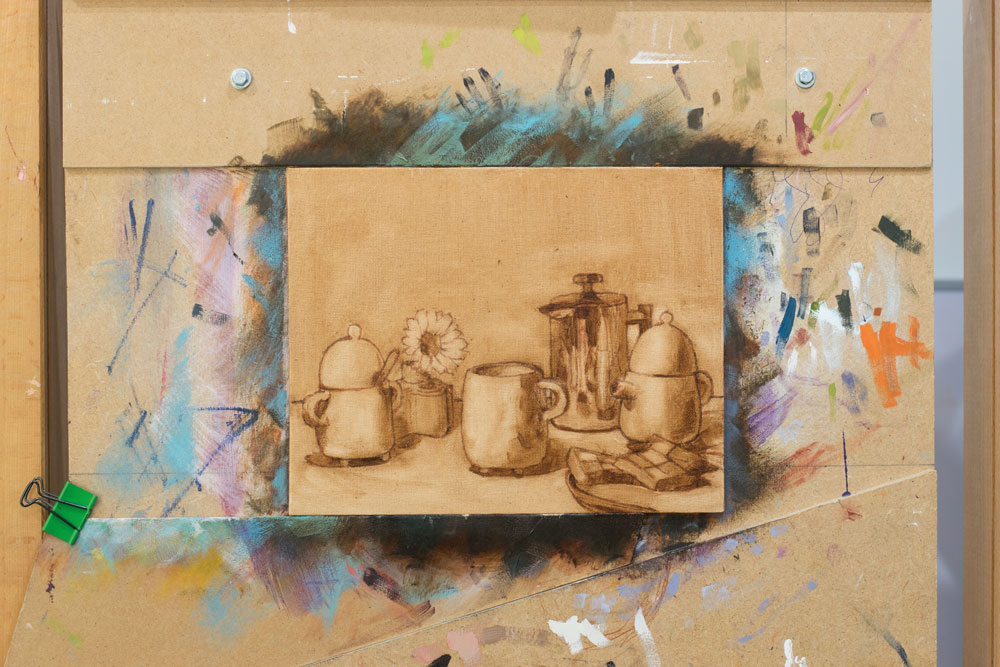
A ground is just a layer of colour laid down before you start applying paint proper. There are no hard-and-fast rules about which colours to use when applying a ground but try and think of a colour that is sympathetic to your composition. Here there are a lot of cold greys, creams and blues, so we're choosing a Burnt Umber ground that will add a subtle warmth below the layers of paint.
Because the brushwork is 'painterly', it is inevitable that some of the ground will show though in the finished painting. This is nothing to worry about – on the contrary, it will add a feeling of harmony to your work. Here, we've gone for a roughly 50 per cent toned ground to use as the mid-tone.
06. Tackle the tonal stages
(Image: © Rob Lunn)
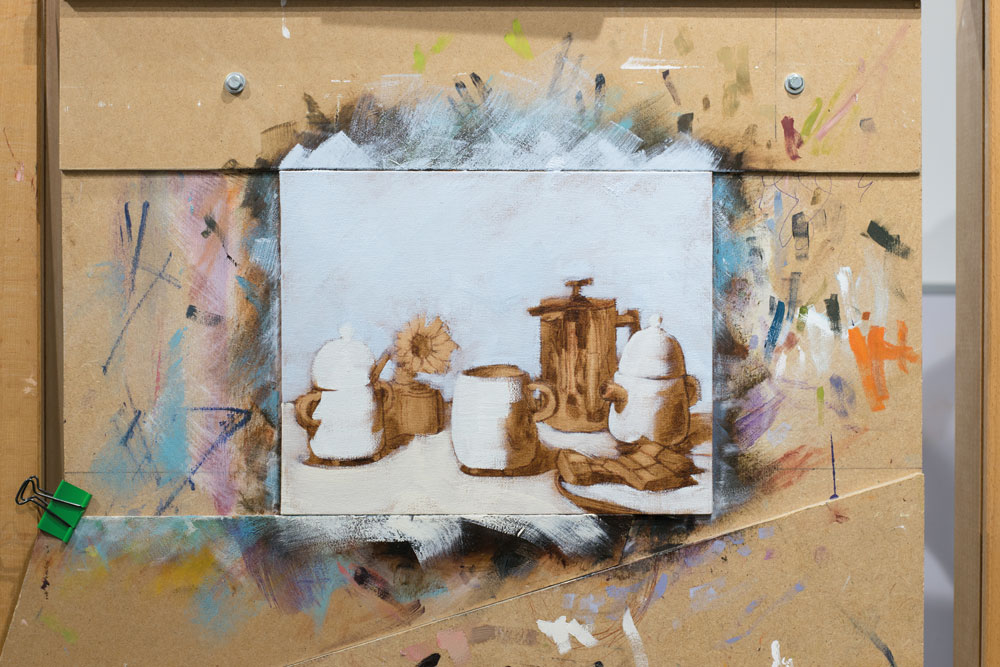
Two main aspects to colour are saturation – or the vibrancy of the colour – and tone. These two aspects of colour should be tackled separately, but they always inform each other too. Tone is about how light or dark a colour is. It's a good idea to get yourself a tonal scale tool so you can gauge the tone accurately. Identify your lightest light and your darkest dark.
Once applied, these will inform your decisions on all the tones in between. Here, we used a sheet of kitchen roll to knock back the lighter areas and applied more Burnt Umber for the darker areas.
07. Mix it up

(Image: © Rob Lunn)
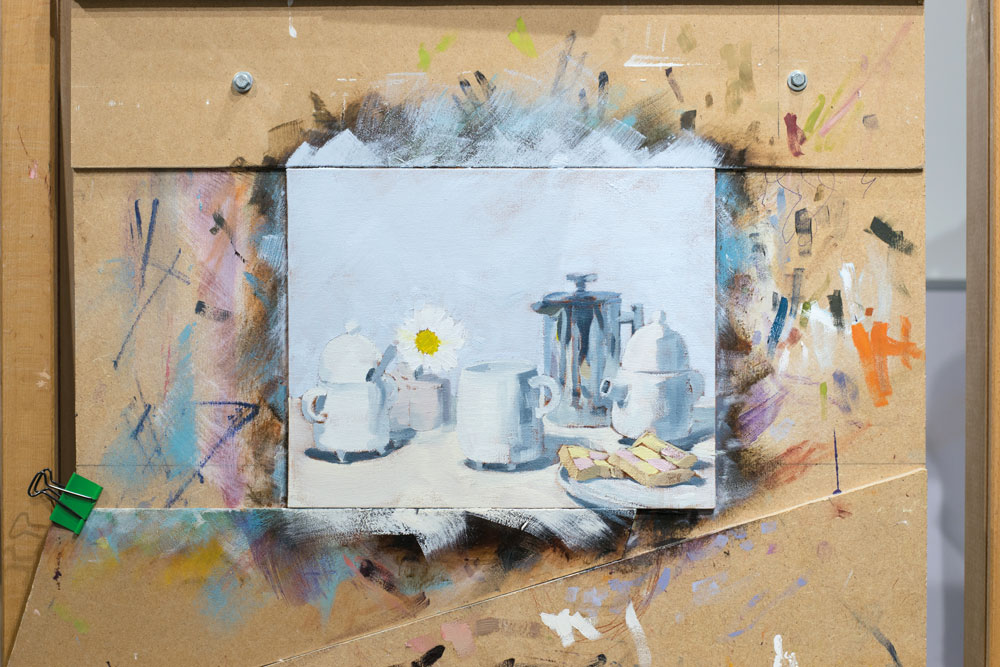
Take the time to pre-mix the majority of your colours before you lay down a single brushstroke. Observing and analysing the colours in your composition will pay dividends once you start painting. Solid draftsmanship joined by careful colour observation allows for expressive and powerful brushwork, so don't sell your work short. This piece is all about greys and creams so we've mixed the black using Alizarin Crimson, Blue Lake and Bright Yellow Lake, and 99 per cent of the colours will derive from this base colour.The grey is then taken out to a number of colour options.
08. Start blocking in
(Image: © Rob Lunn)
The blocking-in stage is all about pushing the painting along as a whole. It's also your first chance to test the paint mixes you developed in the last step. If any colours don't sit right, now is the time to give them a tweak. Don't get distracted by detail at this early stage – you just want to loosely 'block in' the main large shapes of tone.
Squinting at your subject can help you view less detail. By roughing in the main blocks to begin with, it will allow you to evaluate the subsequent parts of the painting as you move through.
09. Finish blocking in
(Image: © Rob Lunn)
Even though we were trying to not to get distracted by details, you can see that we still managed to get caught up here and there. You need to constantly remind yourself to keep things loose and not focus in on details too soon. It's always tempting to add that highlight that will bring life to an object. This probably won't ever change and that's okay. It's good practice to go over the basics again and again, like a musician practising musical scales. Force yourself to use a big brush for this stage – it'll encourage you to use bold, simple brushstrokes.
10. Take a step back
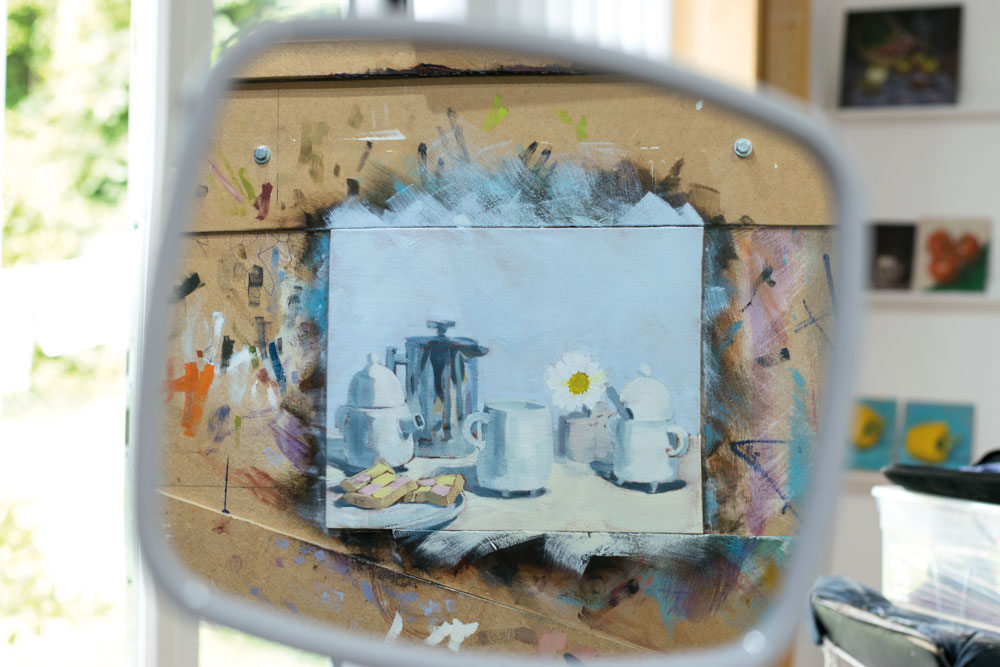
(Image: © Rob Lunn)
Take a step or two back from your easel – it's all too easy to be too close to your work. Try viewing it as a reflection in a mirror, or even turn the panel upside down. These techniques can enable you to see things in your work you wouldn't normally have noticed. Controlling the levels of detail in your painting can guide your viewer to the parts of the painting you want them to focus on. By painting everything in focus, you can leave the viewer not knowing the hierarchy of the objects, and thus what the narrative of the picture is.
11. Redefine form
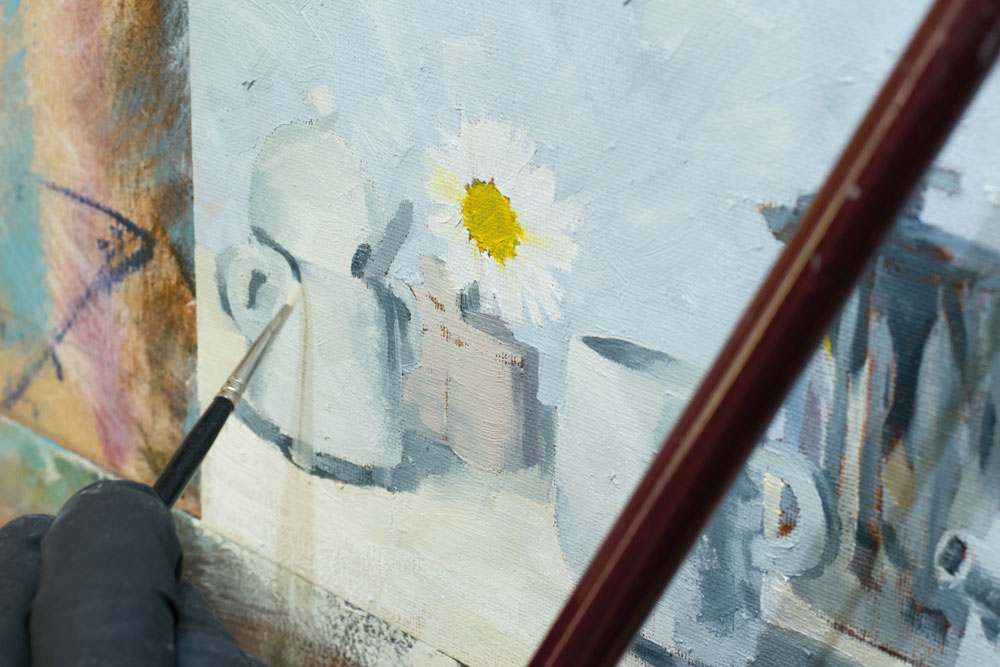
(Image: © Rob Lunn)
So you've decided where you want your focal point to be and you want to start re-establishing some of the definition of form you had in your original sketch. Now that the level of detail is increasing, you can start using those smaller brushes. A rigger brush is a handy companion for defining the rim of an object or the thin umbra shadow around an object's base. Remember that those areas of greater detail are where the viewer's eye is going to be drawn. Render the focal point of your composition and leave the other parts with larger and bolder brushwork.
12. Complete the finishing touches
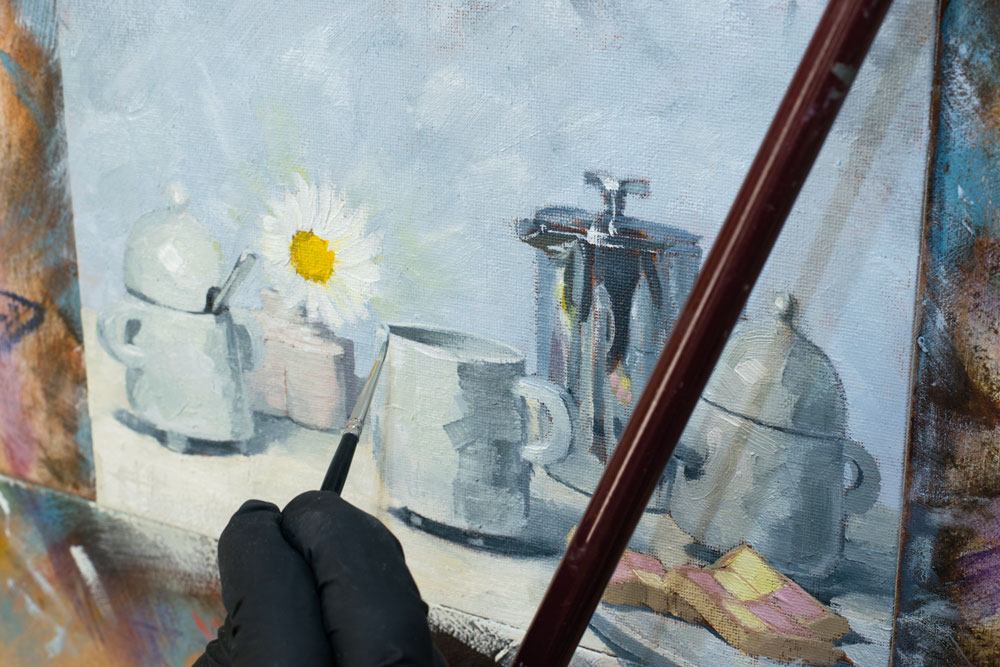
(Image: © Rob Lunn)
Finally, you'll be relieved to hear that it's time to start laying in those finer details, such as highlights. Choose these finishing touches carefully though – it's all too easy to overwork a painting at this stage. Less can definitely be more. Don't worry about making mistakes – they enable you to learn. Each painting is a like a stepping stone, each leading onto the next. Allow yourself the space to grow from each painting and enjoy the process. It's all about the journey, and with the right knowledge you can start off on the right foot.
This content originally appeared in Paint & Draw: Oils. You can buy the Oils bookazine here . Or explore the rest of the Paint & Draw bookazines .
Read more:
- How to paint a seascape using oil paints
- How to get started with oil painting
- How to stretch a canvas and set up for oil paints
Rob Lunn is a self-taught painter, and loves to paint in oils. His influences are Vincent van Gogh, Caravaggio and Ilya Repin. He has taught art workshops since 2012.
Related articles
Black and White Woman Oil Painting
Source: https://www.creativebloq.com/how-to/painting-still-life-in-oil
0 Response to "Black and White Woman Oil Painting"
Post a Comment